Ingredients
1 – Computer (Mac only)
1 – iMovie software
1 – green screen clip
1 – background image
Directions
NOTE This is a continuation of the Green Screen Effect in iMovie. You’ll need to complete that recipe before you attempt this one.
-
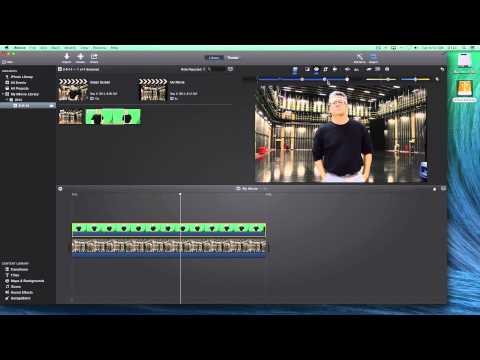
In the adjustment panel, where previously we had selected Fit to have the image fit the screen, we now want to select Crop to Fill to have the image fill the screen with the correct aspect ratio. You can adjust the position and size of the selected area by clicking and dragging the boundary box.
-
Next, we select Color Correction. Increase the saturation to make the subject look less washed out.
-
Return to the Video Overlay Settings adjustment panel.
-
Using the Softness slider, you can make small adjustments here. For most instances, somewhere in the middle of the slider will provide the best results.
-
For issues such as large shadows on the green screen, select the Eraser tool in theClean Up area and then click where the shadow is. It should disappear.
-
Another technique for fixing large mistakes is using the Crop tool from the Clean Uparea. Clicking this tool allows you to manipulate 4 white dots that appear in the corners to adjust what portion of the green screen footage gets “masked out”. In the video, we are able to eliminate the corner of the computer that remains in the shot. Beware that over doing the cropping means you can crop out entire heads and body parts in your footage so be careful. It may also be a good idea to practice these techniques before attempting to implement them in a major project.